The new player experience in RUST is a rough one. The community is hardcore, the PVP gameplay is cutthroat, and the game’s mechanics are varied and complex. This beginner’s guide will help you tough out your first few nights in RUST, taking you from the beach (RUST’s starter zone) to your first starter base. We promise, once you’re done, you’ll begin to see why RUST players just can’t seem to quit.
Choosing a Server
In the RUST main menu, click on the Play Now button. This will bring up a list of available servers. They’re divided into categories, like Official and Community.
The Official servers are where the RUST veterans play. If you try with a new account, they’ll single you out and eat you up. Spend time learning the basics and increasing your experience, or buy an established RUST steam account to dive in straight away.
For now, click on the Community tab, find an empty server with decent ping, and load into the world.
Your First Steps
Main Objectives:
- Gather cloth, wood, and stone
- Craft a bow and arrow
- Craft sleeping bags
Crafting Your First Bow
After spawning on the Beach (the game’s starter zone), your first order of business will be to craft a bow and arrow to defend yourself. You’ll need some resources:
Gather 50 Cloth and 200 Wood to craft a Bow.
Gather 25 Wood and 10 Stones to craft Wooden Arrows (you get 2 Arrows at a time).
Wood and Stone can be found on the ground throughout the world. Cloth is collected from Hemp Fiber, which is picked from plants.
You can also use the Rock in your inventory to cut down trees for Wood and smash large rocks for Stone.
Quick Tip: When cutting down trees, hit the red X’s that appear for more resources. Similarly, when breaking down rocks, hit the glowing spots.
Craft your Bow and at least 10 Arrows. Then, we’ll move on to your next objective, which is to craft Sleeping Bags.
Crafting Sleeping Bags
When you die, you can choose to respawn on any Sleeping Bag that you’ve laid down. Otherwise, you’ll spawn back at the Beach.
Gather 30 Cloth to craft a Sleeping Bag.
Craft a Sleeping Bag, then lay it down nearby. Even if you don’t plan on making this spot your permanent base, having an active Sleeping Bag will save you a long trip back if you eat dirt.
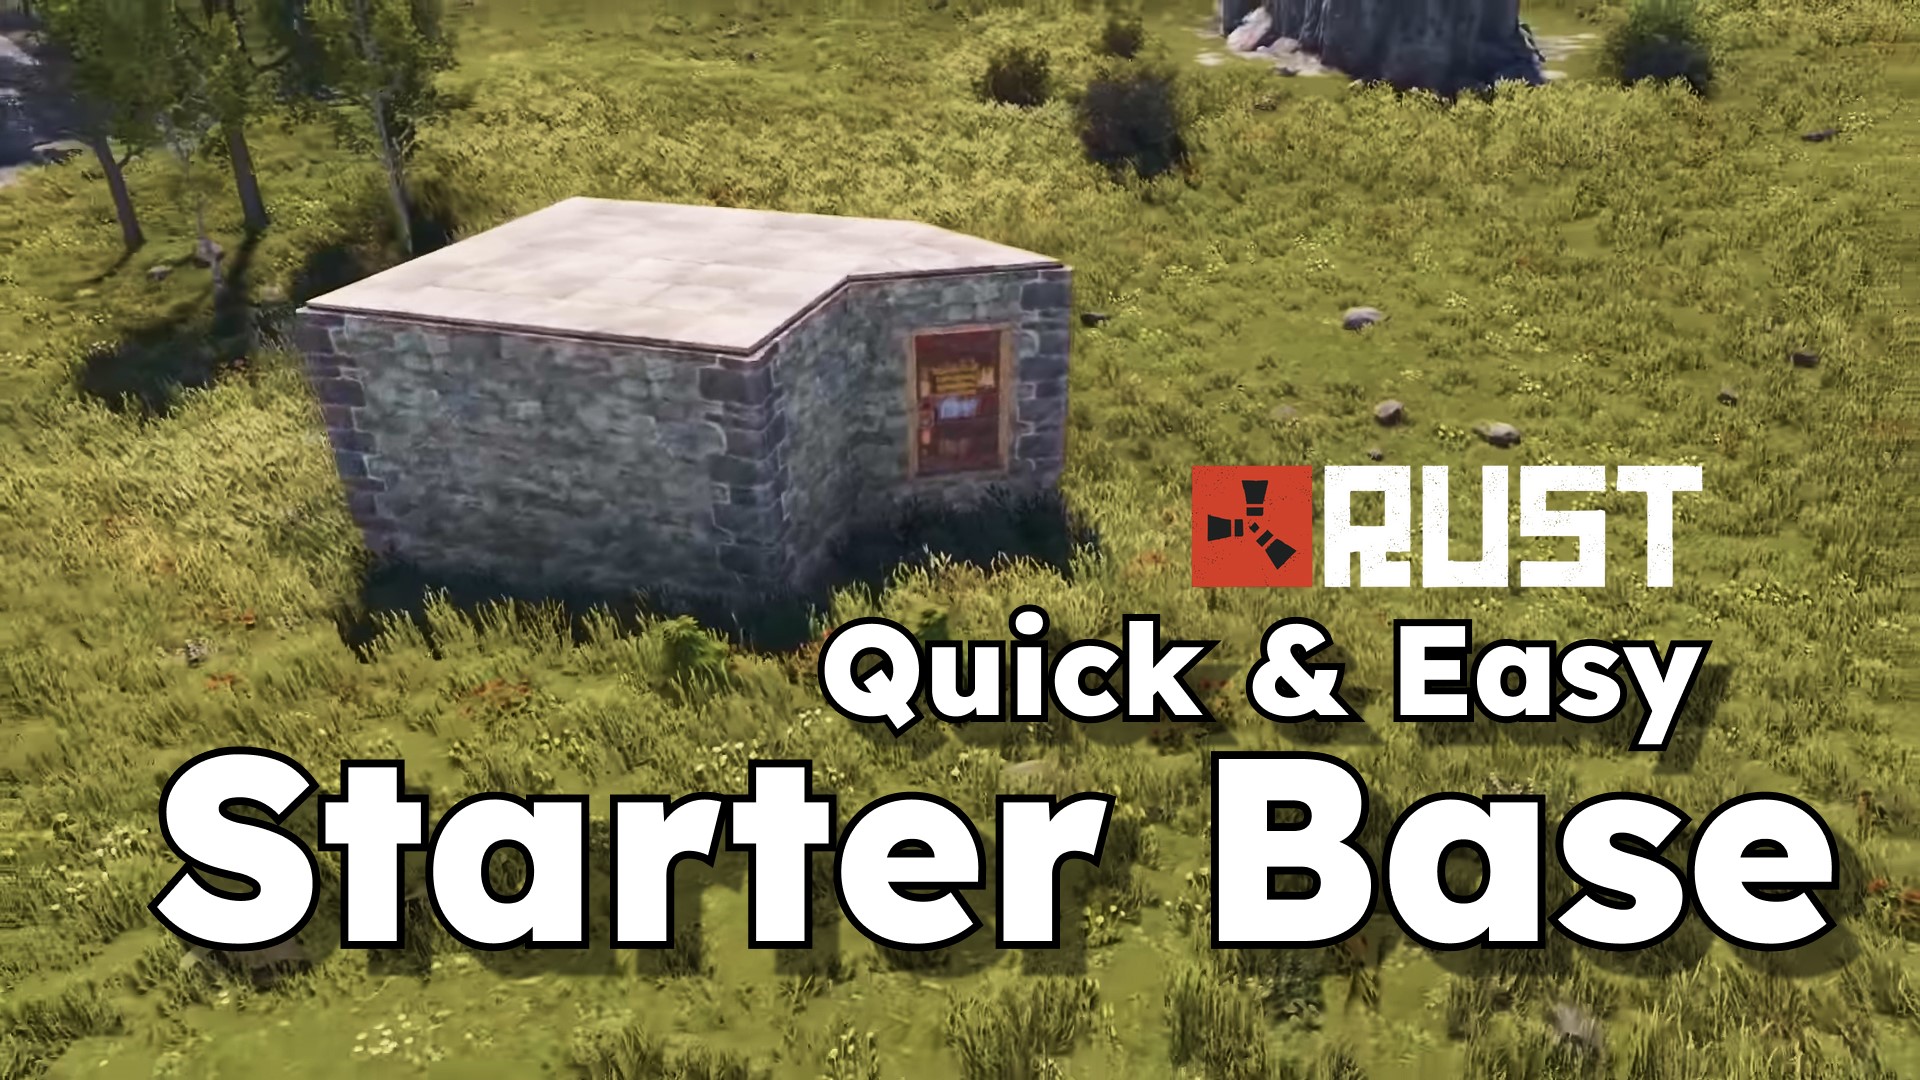
Building Your First Base
Main objectives:
- Craft a Hammer
- Craft a Tool Cupboard
- Craft a Lock
- Build a simple starter base
- Build an airlock to secure the entrance
- Upgrade your base to Stone
Crafting a Hammer
The Hammer is a crucial tool for building your base. It lets you rotate, repair, and upgrade your base’s structures. Fortunately, it won’t take you long to craft one.
Gather 100 Wood to craft a Hammer.
Building the Foundation
Now you can start placing down the floors of your base. Start with a single square floor, then build the walls around it. Place a doorway in one of the walls so you can get in and out.
Don’t forget to lay down a Sleeping Bag so you can respawn here if you die.
Crafting a Tool Cupboard and Lock
The Tool Cupboard blocks players from building, modifying, or dismantling your structures. Without a Tool Cupboard, players could just use a hammer to tear their walls down with a click.
Gather 1000 Wood to craft a Tool Cupboard.
Only players with a Lock Key can access your Tool Cupboard. You can craft Lock Keys and share them with others, which is useful when you want to build a shared base with a friend.
Gather 100 Wood to craft a Lock.
Place your Tool Cupboard somewhere in your starter base, then secure it with the Lock.
Building an Airlock
There’s still one big hole in your plans (literally): you don’t have doors to keep undesirables out.
A simple door won’t cut it. Imagine this scenario:
A hostile player attacks you. You run home, opening the door before an arrow catches you. Now you’re dead, and the bad guy has access to your base.
An Airlock prevents this. It’s a special room before your entrance that protects the door to your base.
Reimagine the above scenario with an Airlock. You open the door to your Airlock and die. They can get into your Airlock but still have to deal with the door to your base. Your hard-earned treasures are safe (for now).
To build an Airlock, add a triangular floor that connects to your current doorway. Close it out with walls and a roof. Then add two doors: one in the doorway you built previously (which leads to your Tool Cupboard), and the other in one of the remaining two walls.
Make sure to orient both doors so that they open towards the inside of the Airlock! This makes it so that when you open one door, it blocks the other, so you can only have one door open at a time.
Fortify Your Walls and Floor with Stone
One last thing to take care of: your base is made of Twig, and it doesn’t take much to break down twig walls and floors.
Each wall needs 300 Stone to upgrade to a Stone Wall.
What should I do next?
Your next move is up to you. We’d suggest opening up your map (hold “G” on your PC or the up d-pad button on the console) and heading to the nearest Bandit Camp or Outpost. These are safe zones where PVP is punished. There, you’ll also find Workbenches, NPCs, Recyclers, and Vending Machines where you can get harder-to-find materials or craft more advanced tools. You can also buy RUST items to speed up your progress.
Don’t let deaths and failures get you down. Most RUST servers reset every week or month, which means everyone starts from scratch. Knowing how to get a starter base up means you’ll never have to worry about surviving your first few days again!